

How to get started with the Snipping Tool app in Windows 11
Windows had the power to take screenshots for a long fourth dimension with the Snipping Tool, but Windows 11 replaces the archetype Snipping Tool and Snip & Sketch apps with a new version that combines the best features from these apps with an updated interface.
The new app lets you take diverse types of screenshots, select a rectangle or use the complimentary mode, or quickly capture a window or the entire screen. The 2d part of the experience is the new editor that lets y'all ingather, annotate, and salvage or share the screenshot.
In this Windows 11 guide, we volition walk y'all through the steps to have screenshots using the Snipping Tool app.
How to start using Snipping Tool
The Snipping Tool is a straightforward app. You lot tin can take screenshots on Windows 11 through the app or shortcut. In add-on, the app includes various settings you can configure, including the power to use the Print screen button instead of the Windows key + Shift + Due south shortcut.
Screen capture via app
To take screenshots through the Snipping Tool app, utilize these steps:
- Open Start.
- Search for Snipping Tool and click the top result to open the app.
-
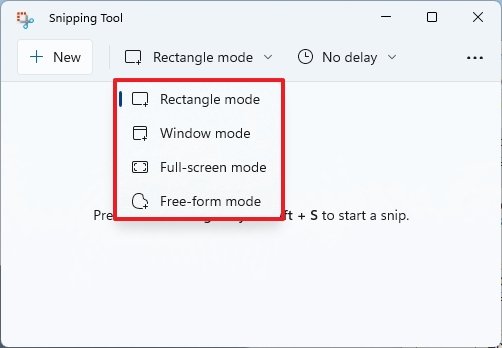
Select one of the available screen capture modes, including:
- Rectangle fashion — creates a rectangle screenshot using the mouse.
- Window manner — saves a screenshot of a window.
- Full-screen mode — takes a screenshot of the entire screen.
-
Gratuitous-form style — allows you to use the mouse to select whatever form you desire from the screen.
 Source: Windows Central
-
(Optional) Use the Delay option to delay the capture for upwards to 10 seconds.
 Source: Windows Primal
 Quick annotation: This option tin come up in handy when trying to capture a particular activeness.
-
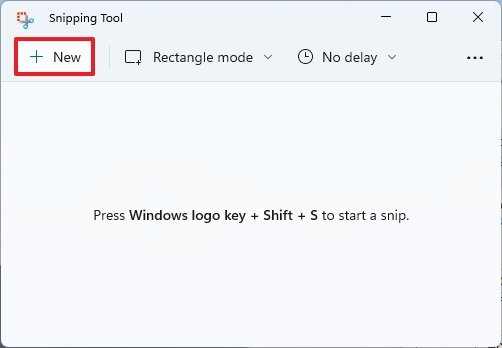
Click the New push button.
 Source: Windows Central
 - Create the screenshot with the mode you selected.


Once you complete the steps, the screenshot will open in the Snipping Tool editor, where y'all can salve the capture or annotate before sharing information technology.
Screen capture via shortcut
Alternatively, you tin can also apply a keyboard shortcut to rapidly bring upwardly the tools to take a screenshot on Windows 11. Hither's how:
- Use the Windows central + Shift + Due south keyboard shortcut.
-
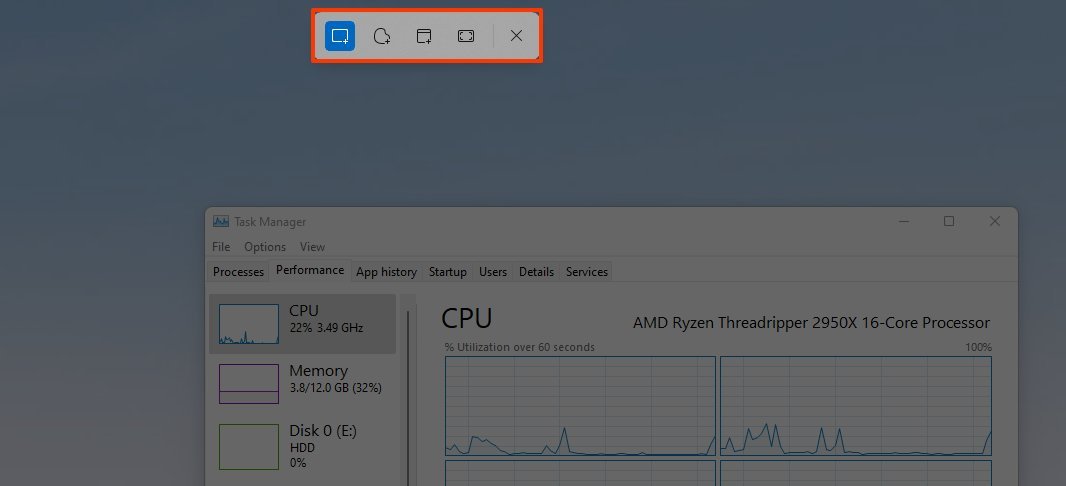
Select one of the screen capture modes:
- Rectangle mode.
- Window mode
- Full-screen fashion
- Free-course way.
 Source: Windows Central
 - Create the screenshot with the option you lot selected.

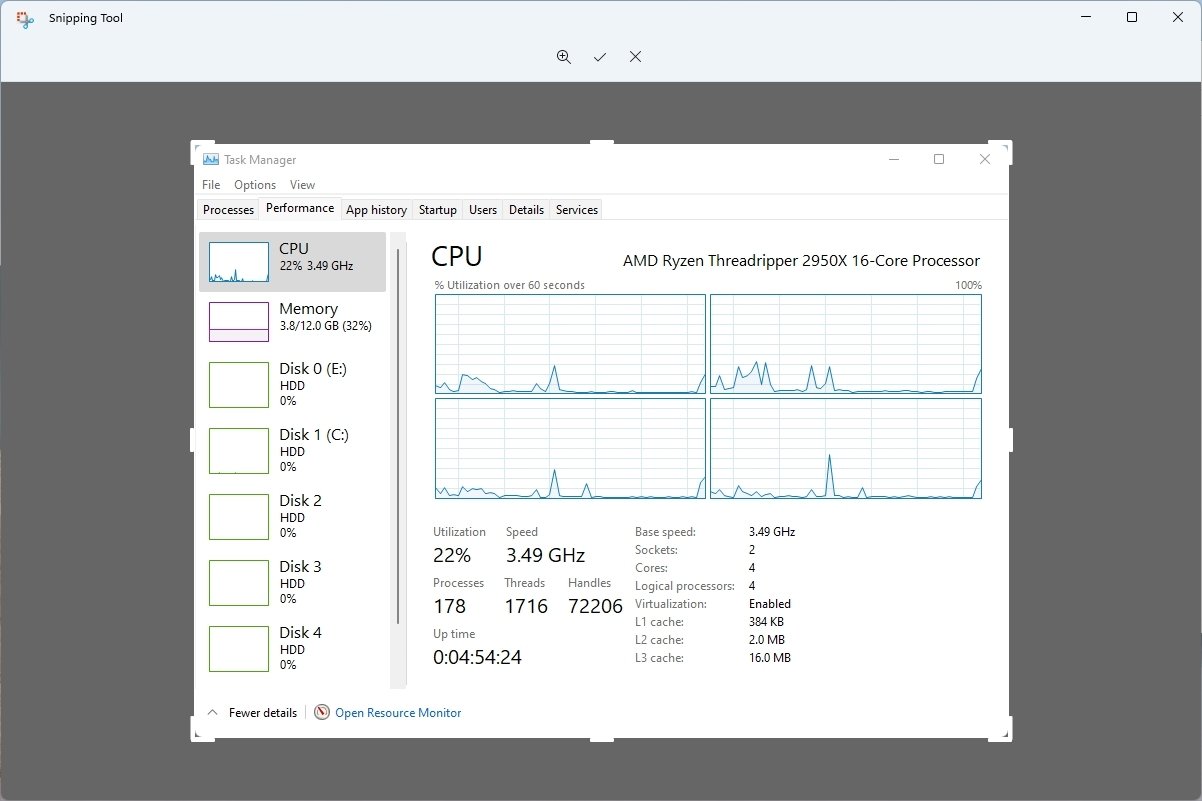
After yous consummate the steps, the capture volition open up with the Snipping Tool editor.
Editing screenshot
To edit and salve the screenshot, use these steps:
- Click the Epitome Crop tool in the command bar.
- Use the edges to ingather and resize the screenshot.
-
Click the Cheque button to apply the changes.
 Source: Windows Central
 -
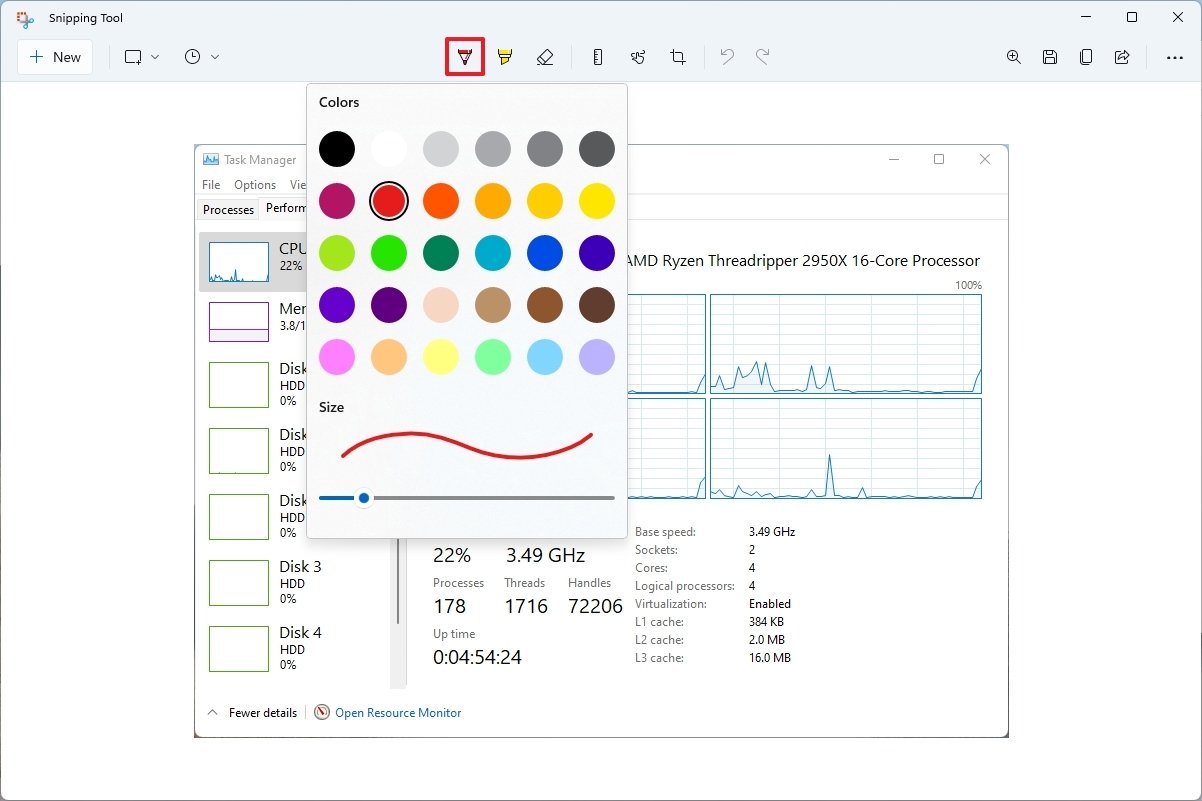
Use the Ballpoint pen, Highlighter, or Touch on Writing features to annotate the image.
 Source: Windows Key
 Quick tip: The Ballpoint pen and Highlighter have dissimilar options to alter the color and stroke size to comment the paradigm.
-
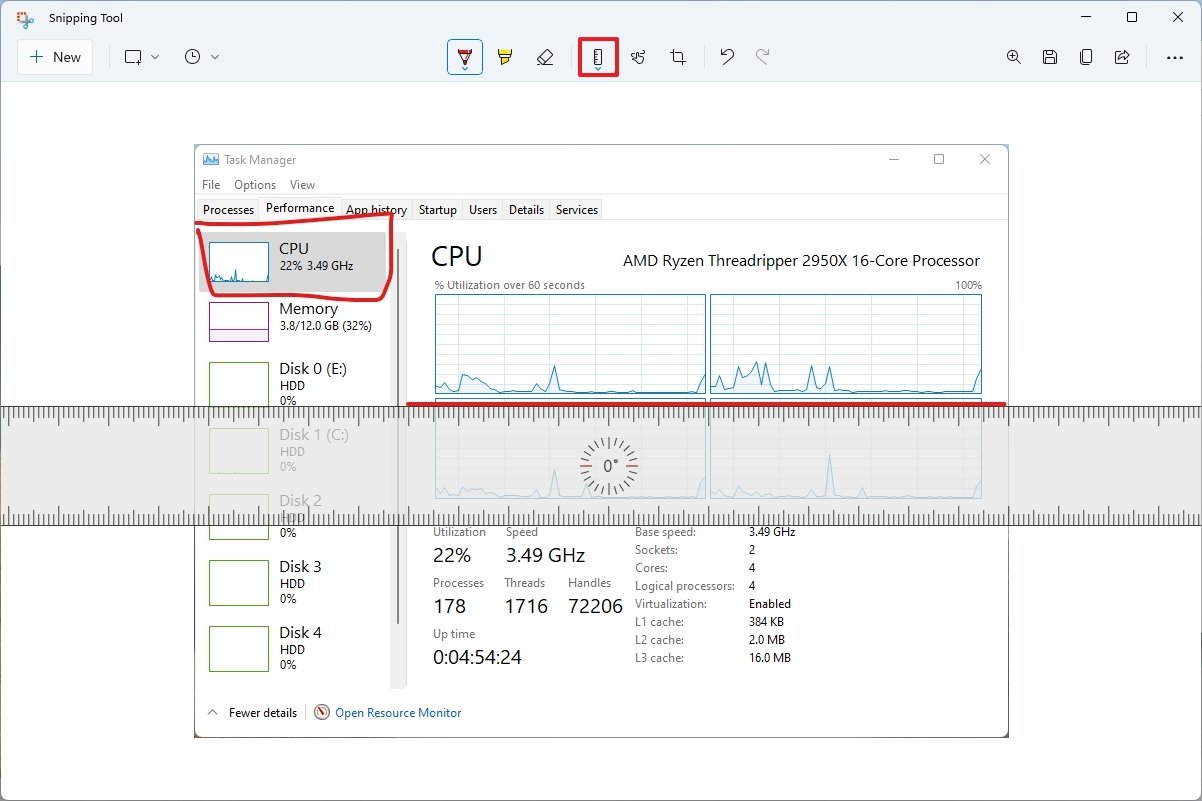
(Optional) Use the Ruler to depict straight lines.
 Source: Windows Central
 - Utilise the Eraser to delete strokes.
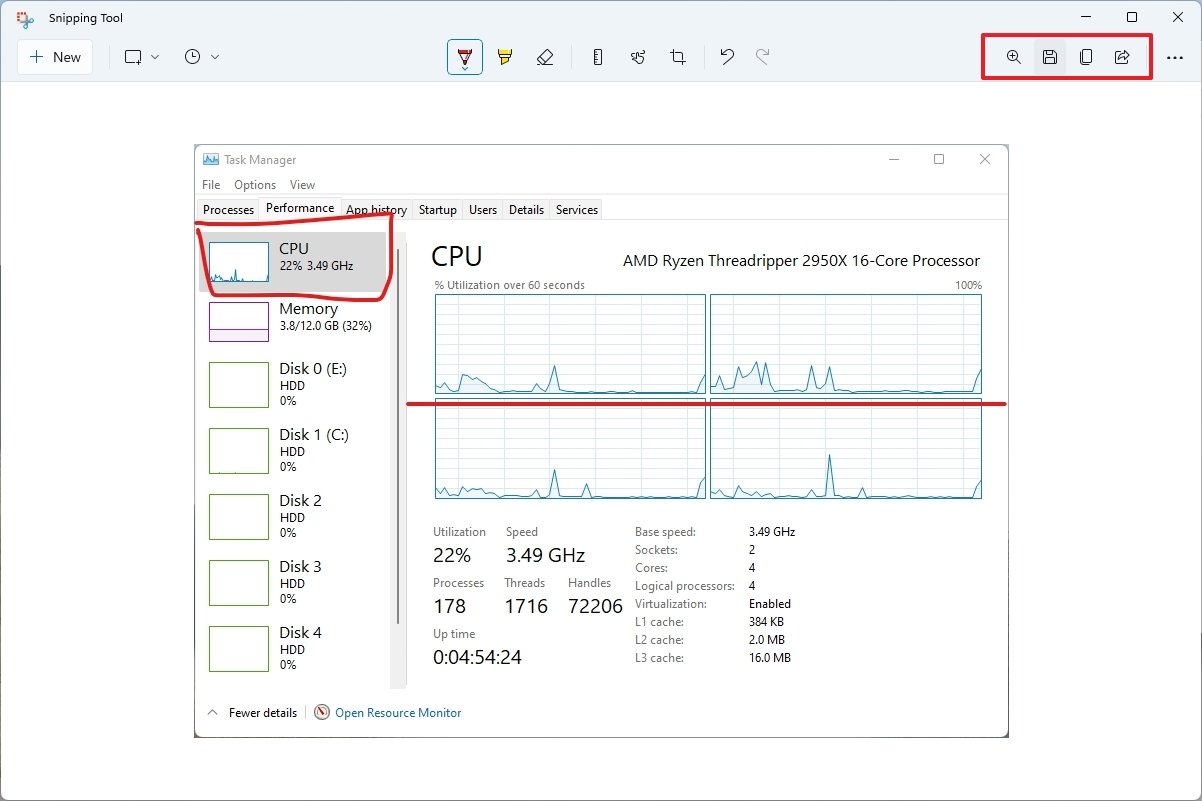
- (Optional) Click the Copy button from the elevation correct to copy the image to the clipboard and paste information technology on a document.
-
Click the Save button from the elevation correct to salve the screenshot as an image file (.jpg, .png, or .gif).
 Source: Windows Central
 - Click the Share button from the top right to share the capture with other people using different apps.


One time you complete the steps, the screenshot will salvage on the estimator.
Adjust settings
In this new version of Snipping Tool, you lot can configure various settings.
To change the app settings, use these steps:
- Open Start.
- Search for Snipping Tool and click the summit result to open up the app.
-
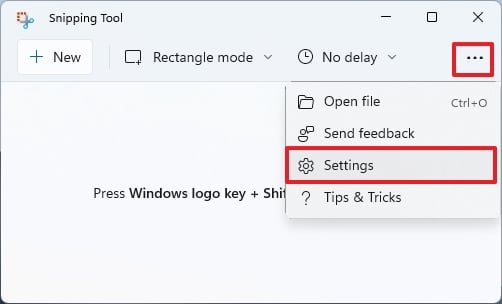
Click the See more than (three-dotted) menu and select the Settings choice.
 Source: Windows Cardinal
 -
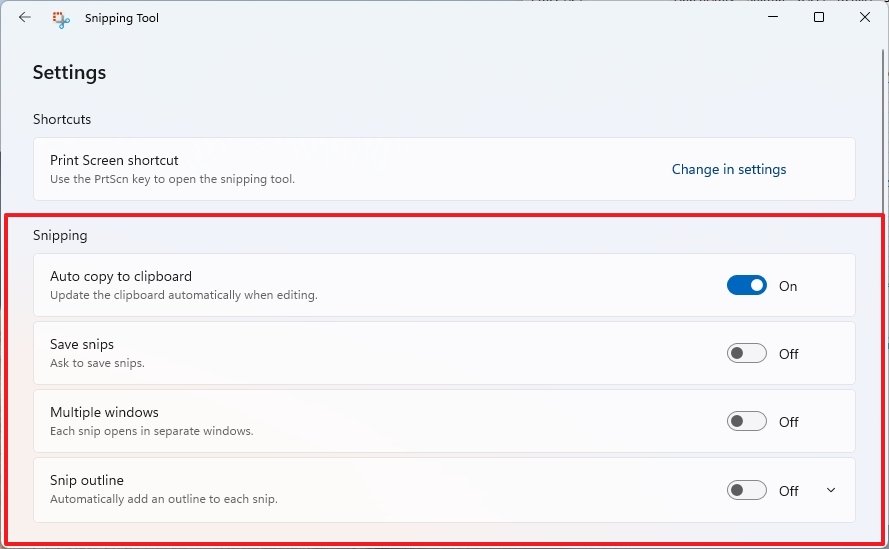
In the Settings folio, enable or disable the options as needed:
- Car re-create to clipboard — Copies the capture in the clipboard for easy pasting onto documents.
- Salvage snips — Asks to salve the capture every bit you close the editor.
- Multiple windows — Launches a new instance of the app for each capture.
- Snip outline — Inserts borders to each snip automatically.
 Source: Windows Key
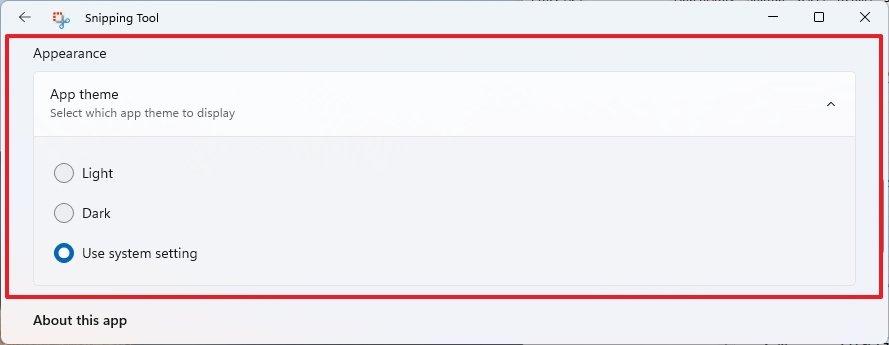
 - Nether the "Appearance" section, select the App theme setting.
-
Select the colour theme. Options bachelor:
- Light.
- Dark.
-
Use organisation setting.
 Source: Windows Central
-
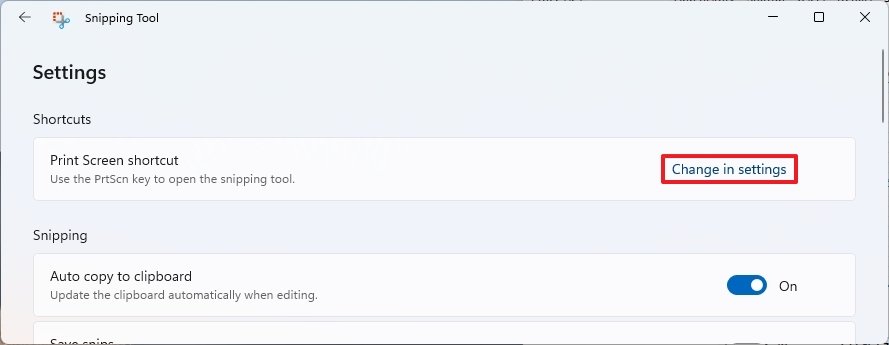
Under the "Shortcuts" section, click the Alter in settings option for the Print Screen shortcut setting.
 Source: Windows Fundamental
 - Click the Yes button.
-
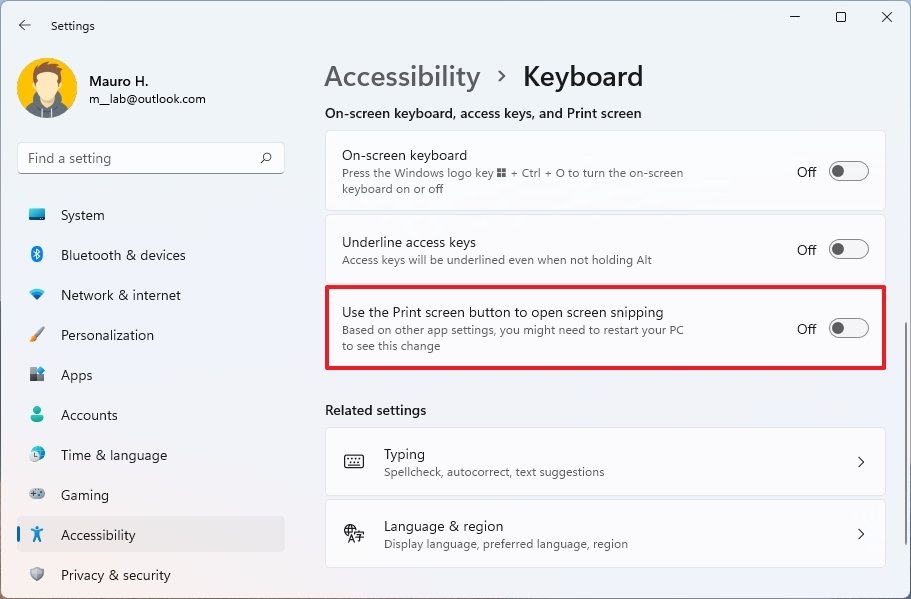
Turn on the Use the Print screen button to open up screen snipping toggle switch to use the Print screen button instead of the Windows cardinal + Shift + South shortcut to open the tool.
 Source: Windows Central


After you complete the steps, the settings will employ automatically.
More Windows resources
For more than helpful manufactures, coverage, and answers to mutual questions about Windows 10 and Windows 11, visit the following resource:
- Windows 11 on Windows Cardinal — All you need to know
- Windows 11 help, tips, and tricks
- Windows 10 on Windows Key — All you need to know

Source: https://www.windowscentral.com/how-get-started-snipping-tool-app-windows-11
Posted by: turnercourry.blogspot.com
0 Response to "How to get started with the Snipping Tool app in Windows 11"
Post a Comment